The Hallway Bathroom…Flooring & A Shower Demolition

0 Flares 0 Flares ×
Hey Friends!!
I hope you guys are having a great week!! 
Yesterday, I shared a little tutorial on the beadboard wallpaper project & also showed you a few updated pictures of the bathroom with the new wallpaper in place! I’m LOVING the changes happening in this room and I’m excited to say that there a few more changes coming!! 🙂

You see, there are a couple other problems that need to be addressed in this space….

Problem #1

When we first moved into this home 7 years ago, we took up the nasty carpet that was in the space & replaced it with some inexpensive peel & stick vinyl floor tiles. We were newlyweds at the time & didn’t have a lot of extra money to spend on flooring. The vinyl tiles served their purpose for the time being, but over time they have started to shift & we are starting to get a few gaps here & there…..

Once I got the beadboard wallpaper put up, I thought to myself….
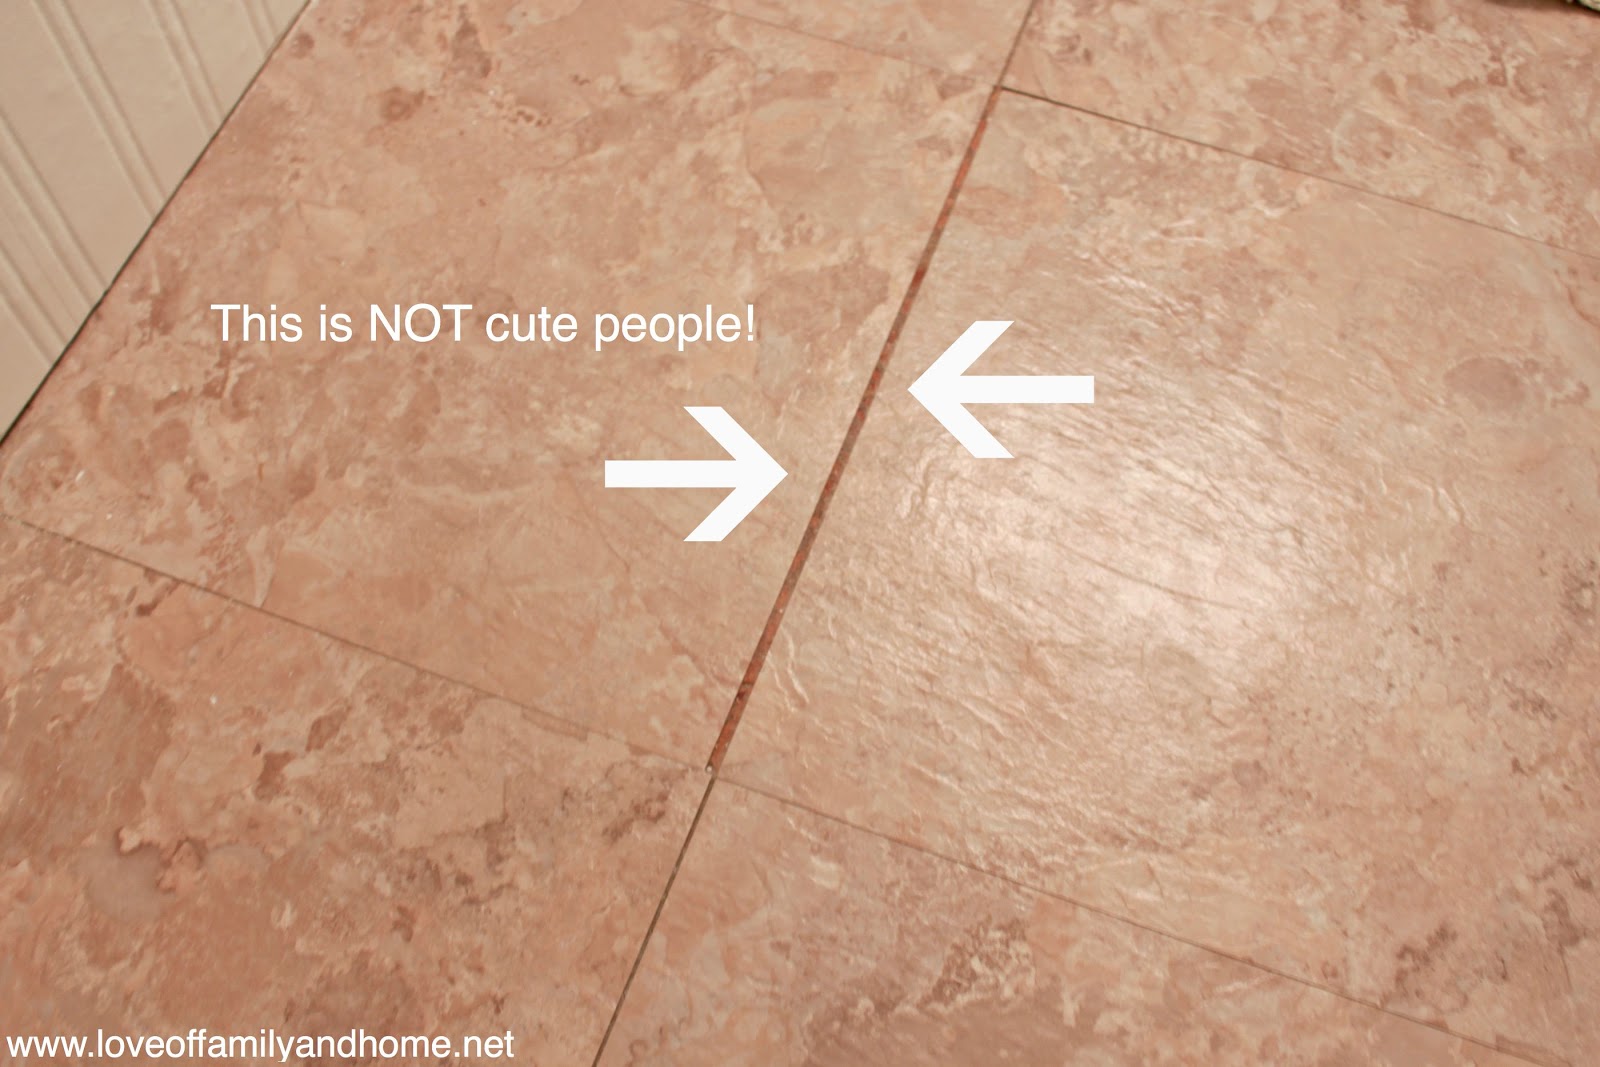
“Might as well put some new flooring down while we’ve got the baseboards up!” 

So, I talked it over with the hubby & he agreed that it made sense. So very soon we will be installing some new floors!

Woo Hoo!! I’m excited!! 🙂
Now, I just have to get some ceramic tile picked out!
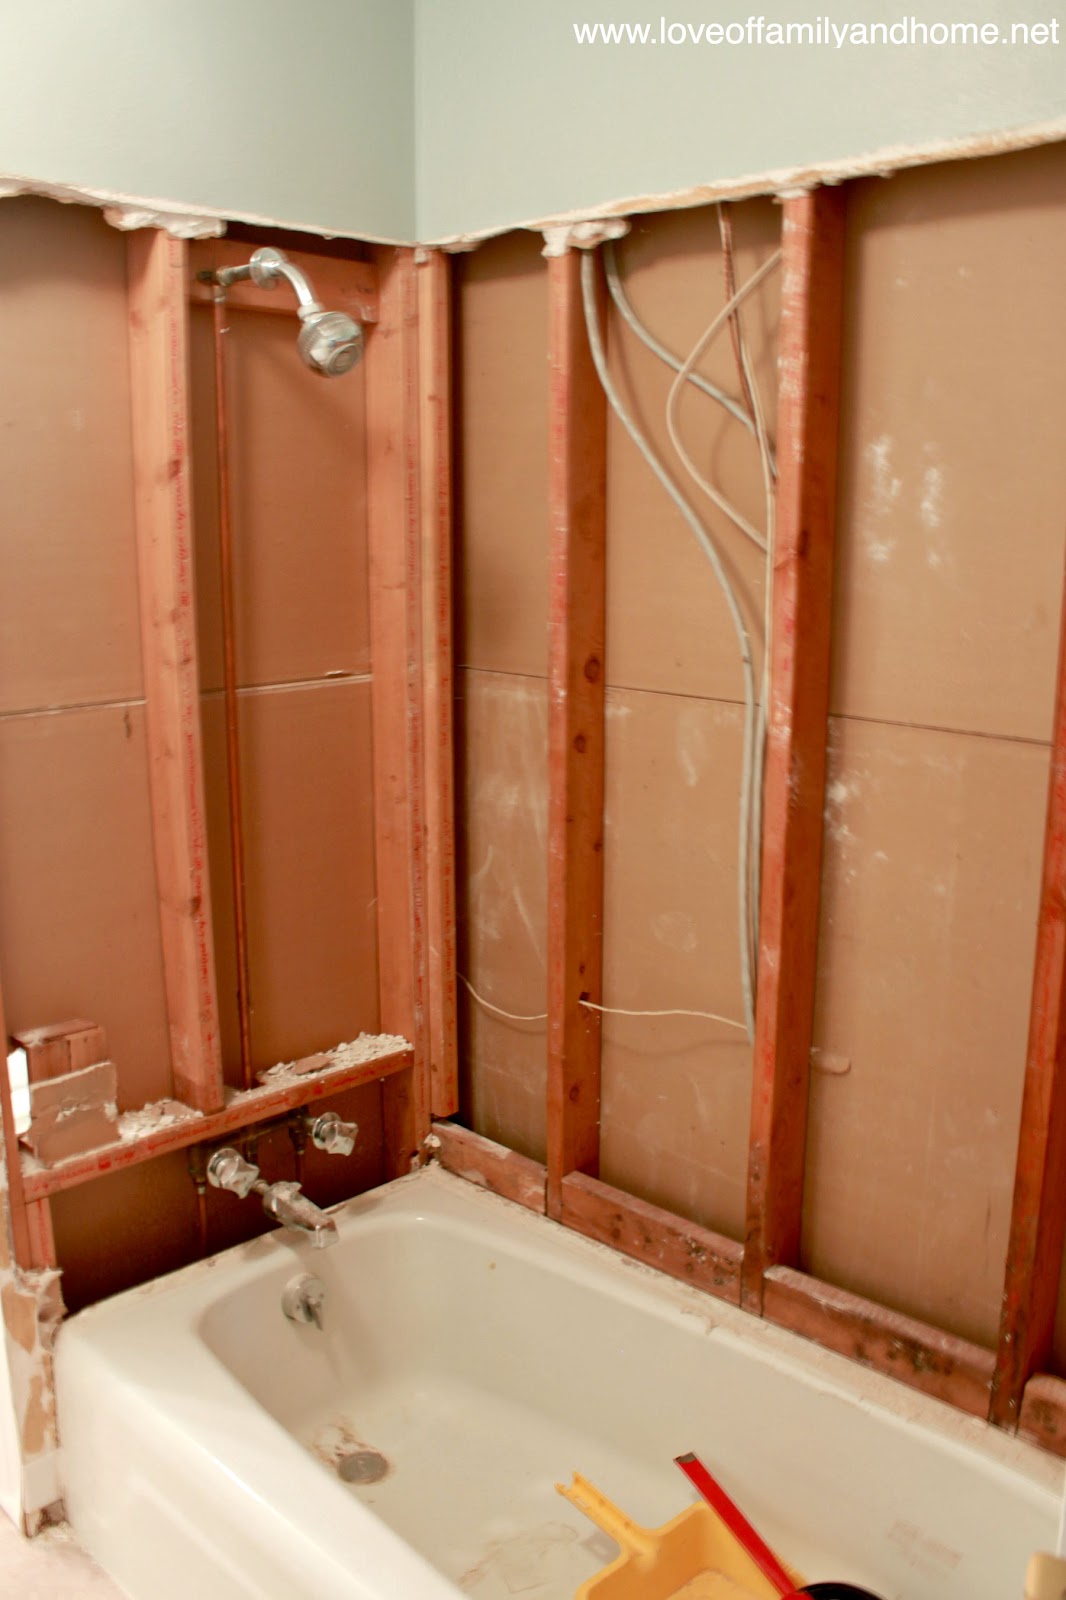
Problem #2

We’ve also had some issues with the shower in this room for the past 2-3 years….
So much so that we had to COMPLETELY quit using it!!
That’s right this shower has completely been out of commission for almost 3 years now! We kept having issues with the old tile falling off the wall & were worried about water getting into the drywall & leaking down the wall. So, one day, we just decided to quit using it all together! Hence all of the old bath toys laying in the bottom of the tub…..just keepin’ it real people! I just shut the shower curtain & kinda forgot all about it! Needless to say, we have all been bathing/showering in the master bathroom!

It’s embarrassing, but bad “before” pictures make for even more impressive “after” pictures….that’s what I’m going with anyway! 🙂 Ahem….

We had been waiting to tackle this project for a while now & since I pretty much had the entire bathroom tore up, we decided now was as good of time as any!  So this past Monday, my hubby had the day off work due to the holiday and he decided to tear into the bathtub. He started by removing all the tile….
The wall above the tub looked to be in pretty good shape, but we were worried about the drywall on the lower part of the wall, along the backside of the tub, since that’s where the tile had been coming off.

We decided to just go ahead & remove the drywall & start fresh!
So down it came…


We were just left with the wall studs & plumbing. The wires you see on the back wall are actually for the laundry room which is on the other side of that wall.

Once the mess was all cleaned up, we began prepping the wall for a new bathtub wall surround that will be installed this upcoming weekend. That meant putting up purple board on the bathtub/shower walls. The purple board was purchased at our local home improvement store & is supposed to be moisture & mildew resistant. This will be an upgrade from the regular old drywall that was previously on the walls. 
The purple board ran about $12.00 a sheet & we ended up using 2 1/2 sheets to complete our project. 
There is a guy coming to our house today who will be doing all the mudding/taping for this project. My dad offered to do it, but he said it would be “testing his skills.” So, we decided it would be best to just spend the extra money & ensure that it is done properly!! There are just some things that you can’t DIY….ya know what I mean?!   

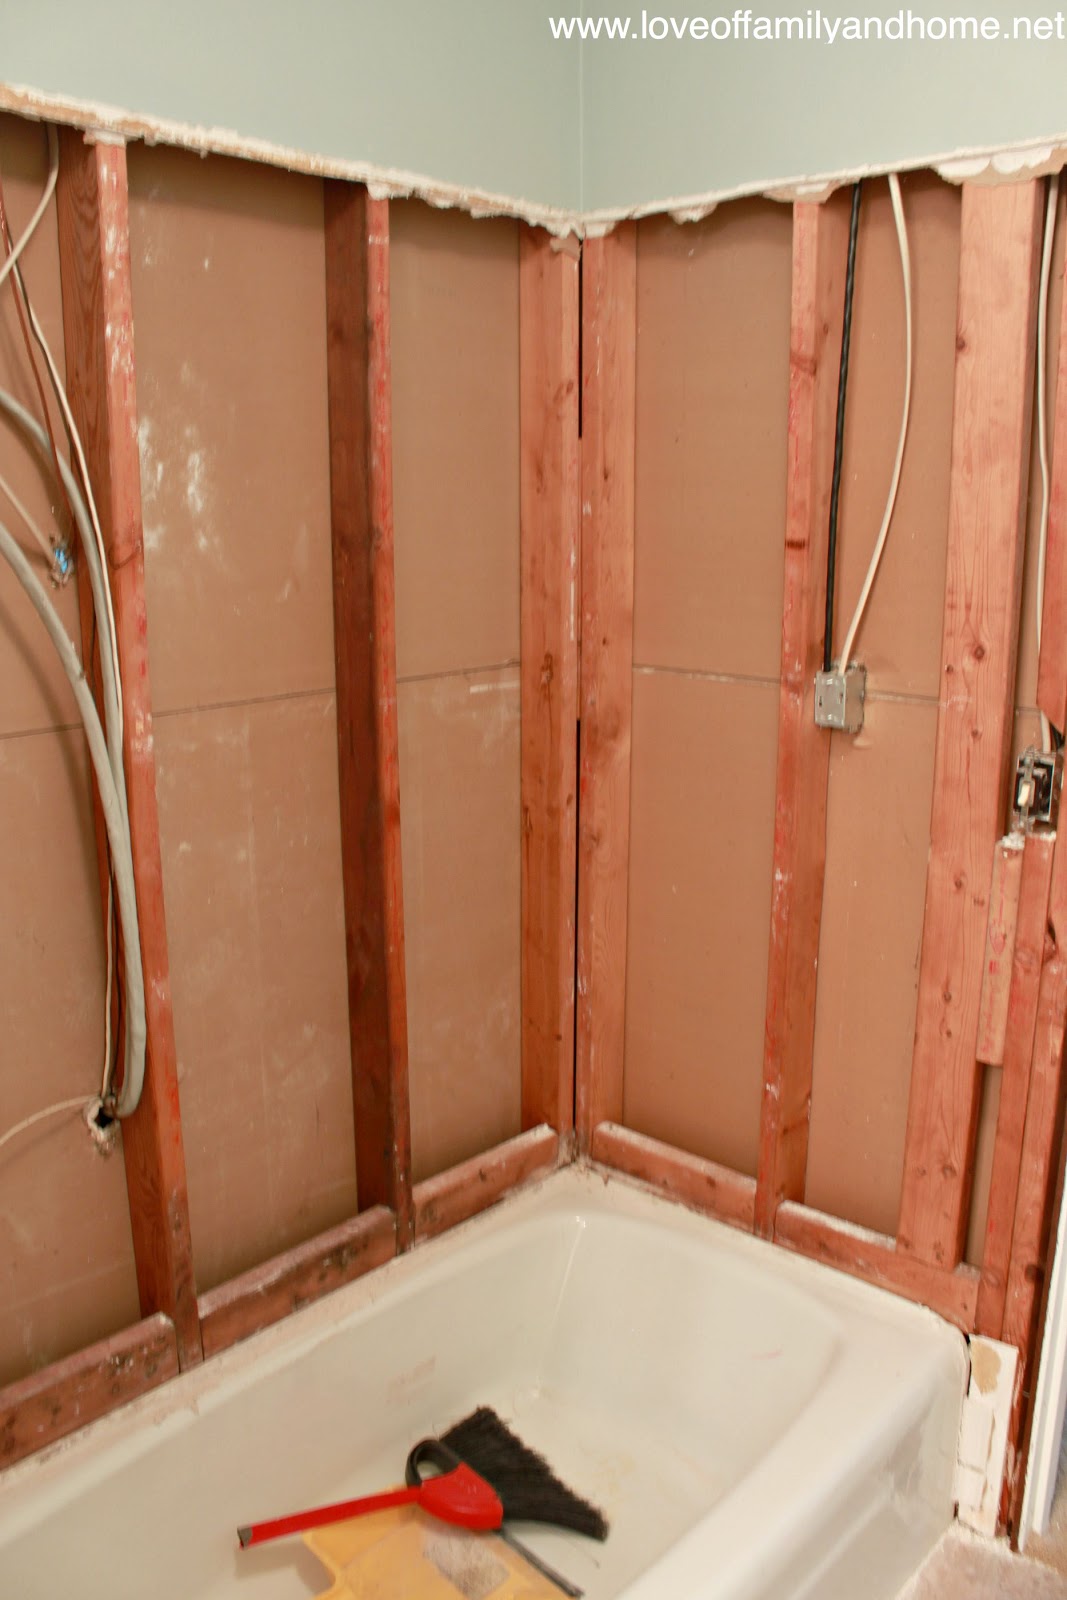
Once the drywall finisher completes his end of the job, we will be installing this bathtub wall surround that we purchased at Lowes…..

Aqua Glass 60″W x 32″D x 58″H High Gloss White Bathtub Wall Surround

Item #: 55712 |  Model #: 39564 $89.00
My dad & hubby installed this exact same unit in my sister’s house just a few months ago & the installation was a breeze! I will be taking pictures along the way & will be sharing a little tutorial on that  as well!

So, that’s our plan! 🙂

Don’t you love how I went from putting up some beadboard wallpaper in the bathroom to getting new flooring & a new shower?! 

Sometimes projects kinda work that way….you think you are just gonna be making a small change & then all of the sudden things get a little more involved!!

Has that ever happened to you?!

Oh well, I’m thrilled to finally be addressing all of the issues in this space & finally getting the bathroom I’ve been wanting!! I’m also excited to share our new & improved room with you guys!!

To get updates over the weekend & see what we’re up to, be sure to follow along on Instagram and/or Facebook!! 

Don’t Miss Out-DIY projects, home decorating, crafts & more by checking out my subscribe page
Related Posts Plugin for WordPress, Blogger...

Comments

  1. one thing leads to another…. tell me something more…
    i can’t wait to see where this goes! 🙂

  2. Haha Tonya, Our bathroom looks just like that, only slightly worse. It’s completely out of comission (no toilet, sink, shower). We decided to remodel ours too. I’m excited about getting it updated, but boy it sure makes a mess everywhere else. Have fun and keep us posted. I am eager to see what you do.

  3. Anonymous says:

    Wow Tonya that wallpaper is really awesome! Keep us posted so excited to see how it comes out. Oh by the say great job too Bob cant leave you out.

    love you

    Nancy

  4. can’t wait to see the end! 🙂

  5. So exciting! And I think that I may find myself in a similar boat once I change out the mirror in my daughter’s bathroom.

    Sharon

  6. Anonymous says:

    I once found some gorgeous wallpaper on a close out at $3 per double roll. I decided to put it up in our dinning room and it looked amazing! So amazing that we then removed the linoleum from the kitchen and dinning room and added hardwoods which led to removing the cheap gray carpet and putting in a very expensive and beautiful carpet in the living room hallway. The living room got a new coat of paint and all the trim in the house got repainted. Gee and thought I was saving some money, LOL!

    Your bathroom is going to be awesome when finished. Doing the same in my bathroom but I’m putting planked walls in and doing a vinyl wood look laminate on the floors.

0 Flares Twitter 0 Facebook 0 Pin It Share 0 Google+ 0 0 Flares ×