Hey Friends!
Did you have a good weekend?! We certainly did!!
The weather was absolutely GORGEOUS here! I even busted out the skinny jeans & boots this weekend! Waaaahhoooo!!! There is just something about the cooler temps & the crisp fall air that always seems to put a little bounce in my step! I even feel like I have more energy! Anyone else?!
I have been busy trying to wrap things up with the laundry makeover & I have yet another little project that I want to share! I showed you all how I painted a rug for the space last week. If you missed that post, you can check it out HERE. Well, I thought while I was at it, that I might as well paint some curtains too…..


What do you think?!
I kinda love them! I searched for some fabric to coordinate with my IKEA prints that were my inspiration for the room makeover, but had no luck. Then, I remembered these curtains that I saw fromWhitney at Shanty to Chic, and I thought why not just modify them a bit to work in this space!
I wanted the curtains to be primarily white, so I went out to Walmart & purchased a white twin size flat sheet for just $4.47. I started off by measuring the length of the window from just above the middle of the window to the bottom of the trim & also figured out the width. Then I cut the the sheet to the dimensions I needed, but gave myself excess length, knowing that I could go back & trim off what I didn’t need.
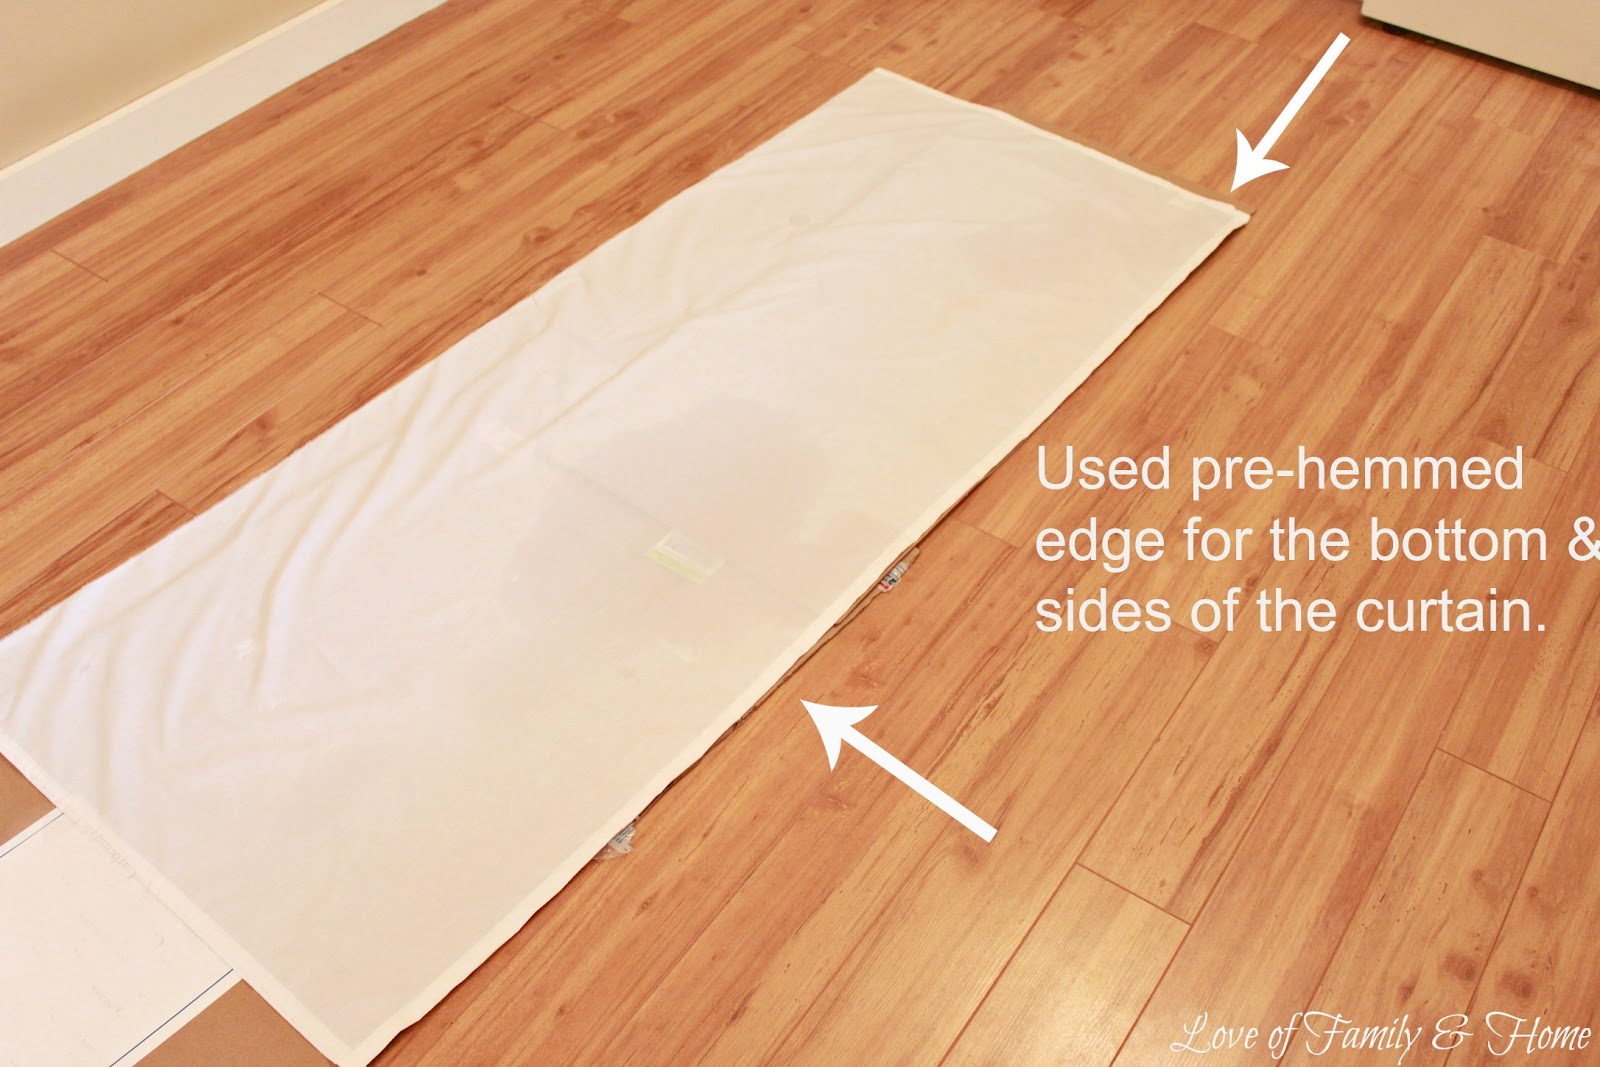
I used the pre-hemmed edges for the bottom & sides of the curtain panels, so that I would only have to add a hem at the top when I was finished. I left the sheet in one piece rather than cutting it into two separate panels to ensure that my stripes would match up on each panel later.
I used my Frog Tape that I got in my swag bag at Haven for this project…

This was my first time using this tape, and I was very happy with the results! Frog tape has a patented paint block to keep edges straight when painting stripes on walls, furniture, fabric, etc.
I placed the Frog Tape on the fabric to create the design that I wanted…

I was doing this project on the wood floor in our kitchen, so to prevent the paint from “bleeding” through onto the floor, I placed a piece of cardboard under the fabric. I also taped the edges of the fabric to the cardboard to prevent it from sliding around.
Then I just used a small craft size paint brush to apply the paint to the fabric….

I ended up giving each stripe two coats of paint and then let them dry thoroughly….

Once the paint was dry, I just removed the Frog Tape to reveal nice, crisp painted lines! LOVE!

And this my friends is where I kinda stopped taking pictures! Sorry!!
I cut the sheet in half & then figured out how wide (full) I would want each one. After a bit of discussion, my mom & I decided that they would probably work best at 22 inches. So we cut each panel accordingly & added a hem to the top. If you didn’t want to sew the hem at the top of the panel, you could also use fabric glue instead or you could even use hot glue like Whitney did. Because my mom is such an awesome little seamstress (and because I don’t own a sewing machine), I enlisted her to put a quick hem in each panel for me!

I used some curtain ring clips I already had (seen in the picture above) & a cheap curtain rod that I purchased at Target for around $6.00 to hang my curtain panels.

And now they are hanging pretty in my new laundry room space….

To see the Full Room Reveal CLICK HERE.
Have you ever painted curtains before?
If not, would you ever consider it?!
It’s a great way to get the look you are wanting without spending a lot of money!
Thanks so much for stopping by & I hope you have a Great Day!!
To keep up with day to day happenings, be sure to follow me on Facebook and/or Instagram!
Don’t Miss Out – DIY projects, home decorating, crafts & more by checking out my subscribe page


ummm what a great idea!!! love them! I have no curtains up yet in our new place. this seems like a great start! 😉 thanks for sharing!
Fabulous idea Tonya!! I may have used that same tape today!! he he!! 😉
NO, I haven’t painted curtains but I am considering it! 🙂 Good to know that Frog Tape from Haven will be the thing to use 🙂
Love your curtains – can’t wait to see the whole room 🙂
Such a great and cost effective idea! I love the color combo you went with!
I have been wanting to paint curtains for awhile now! I think it turned out soo cute! Can’t wait to see the whole reveal! My laundry room reveal never happened because I feel like it is still missing something. Errrr!
This comment has been removed by the author.
Paint** not tape! hehe 🙂
Hi Vanessa! Yes, I just used regular wall paints (sample sizes from Lowes), but you could use craft paint as well!
Hi, found your site from TipJunkie.com post. Great idea and I’m so going to do this very soon, and guess what, in my laundry room too! 🙂 Thankyou again, Kelly
Hiya! I just want to give an enormous thumbs up for the good data you have here on this post.
I might be coming again to your weblog for more soon.
Here is my web site adding an email hyperlink in html
Hey! I just would like to give a huge thumbs up for
the good information you might have right here on this post.
I can be coming back to your blog for more soon.
Look into my webpage reference a website in apa format example
Hi there! I simply want to give a huge thumbs up for the great info you’ve got here on this post.
I might be coming again to your blog for extra soon.
Look at my web page :: best laptop computer for online gaming
Hi there! I just would like to give an enormous thumbs up for the great data you have
here on this post. I shall be coming again to your blog for extra soon.
My blog post: delta shower heads reviews on 75520 junk
Whats up! I simply wish to give an enormous thumbs up for the good info you’ve gotten here on
this post. I will be coming again to your weblog for more soon.
Have a look at my blog … ikea houston tx jobs